When a handwritten-order is entered into the computer system it becomes known as an Entered Order. Follow the next procedure for entering an order into the computer system. This process is the same for any customer, whether it is a phone sale, front counter sale or an outside sale.
At a menu, type “OM3” and press ENTER. Select ORDER from the ring menu. The next window gives you the option to ADD. By selecting ADD, you will enter a new order.
J & E has only three types of sales order designations:
- Charge
- COD
- Cash
Charge customers have submitted a credit application and been approved for credit. These customers have been assigned a specific account number. COD’s are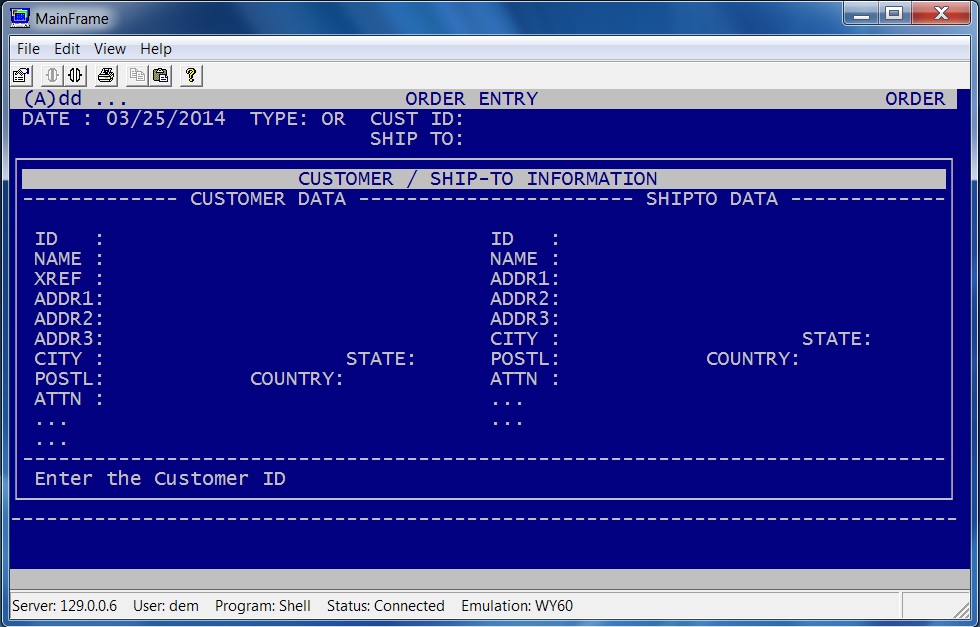 cash orders that the customer wants shipped via a freight company. i.e. UPS, Beaver, etc. COD orders have the account number of 139144. All other orders will be entered under cash account number 9. (Branch orders are handled in a different manner than standard orders. If you get a branch order, give it to the appropriate branch coordinator or your supervisor. DO NOT ENTER IT.)
- To enter in the sales designation press ENTER until the Customer/Ship-to Information window is exploded and looks like the image above. All of the information entered in this window is called Header Information.
- Using Asterisks “*”, put only as much information in as you are absolutely sure of. Keep in mind what you type into the computer must be exactly as the computer has it listed, spelling and spacing included. Certain customers with initials will have spaces between each initial while others will not.
Example: W&W Steel Co. will not have spaces between their letters, while L F Downey Construction will have spaces between the “L” and “F”. Using asterisks will reduce the time looking for customer accounts in the computer.
- Now that you have found the customer account that you want, press A for ACCEPT from the ring menu and the computer will automatically generate an order number.
» Special notes may optionally appear in the upper right corner. You should read and understand the note window before you press DELETE to clear the window.
» It is important to write down your order number before proceeding
Once you have found the customer make sure that it is the correct billing for that customer. Some customers have the same name, or alternate names. Such as “Conoco.” There are several customer listed with the name “Conoco.”
Helpful Tips:
1. Always check the customer account by verifying the address and telephone number.
2. Always ask your customer if they want to use a PO number, even if it’s a cash ticket. If there is an asterisk at the end of the customer name, a PO number MUST be used by your customer in order for them to charge.
3. Always get your customers name and phone number.
4. First letters of a name are typically good to search with.
5. Use “CTRL G” in ID field to search using the phone number.
- The following is a small sample of the various accounts and how you can find them, or what questions you will need to ask.
| Customer says he’s with: | Question(s)you should ask: | What to type into the computer: | To get the following Account: |
|---|---|---|---|
| Atlantic | *ATLANTIC* | Ogden Services/Atlantic | |
| Conoco | Which Conoco?(Hennessey) | CONOCO*HEN* | Conoco-Hennessey Gas Plant |
| Dura Chrome Industries | *DURA*CH* (in EXREF) | DCI | |
| ESP | E*S*P or ESP* (in XREF) | Electric Submersible Pumps |
Now you should be at a screen that looks like the one below. Review the information looking for any information listed in the MISC field.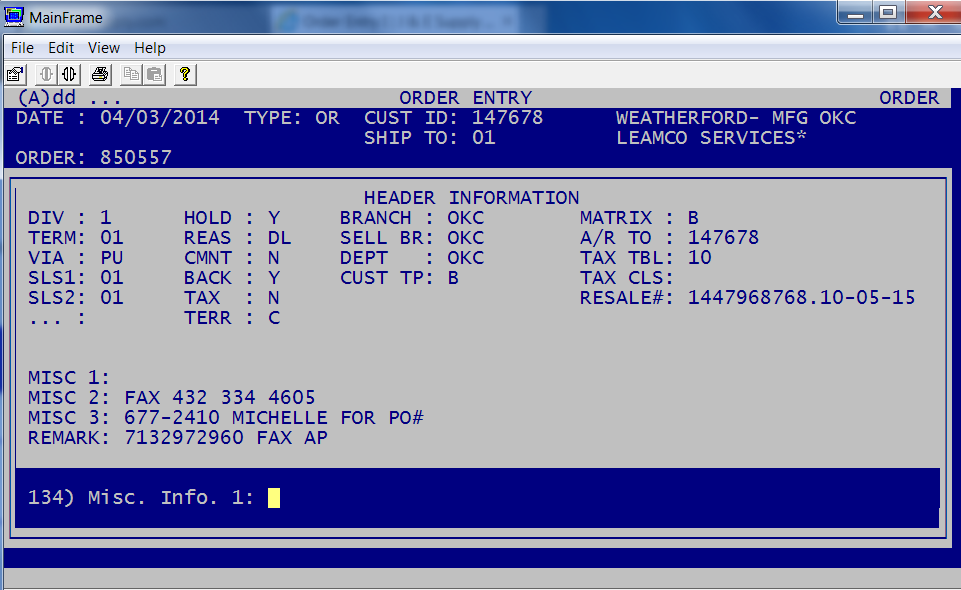
- In field 134, MISC INFO, enter miscellaneous information or blanket PO numbers. Press ENTER.
- Next you will need to enter the REQUEST DATE in field 36, if a delivery date is specified; otherwise just press ENTER.
- In field 15, CUSTOMER PO, enter the PO number if available. If not PO is required, press ENTER. NOTE: If the company name has an asterisk (*) in it a PO number is required for payment. Either get the PO number when they order the merchandise or make sure you call their offices for the PO number.
- In field 152, TAKEN BY, enter your name and press ENTER.
- In field 67, BRANCH, enter the branch that will fill the order so that the inventory for that branch will be updated correctly and press ENTER. Note that after entering items in the line detail, changing field 67 in the header will not change the branch field in the line detail. You must update field 45 in the line detail of each line or delete and re-enter each line.
- In field 54, SHIP VIA, enter either PU (pick-up), OD (our delivery), the appropriate outside sales delivery code or the shipping carrier code, then press ENTER.
- In field 220, SLS ID 2, enter your two digit code for entering orders and press ENTER.
- In field 70, DEPARTMENT, enter the department code from where the handwritten ticket was taken: COUNTER, OKC MUSK, DUN, then press ENTER.
- When the detail screen and HEADER OPTIONS prompt appears, you may make any changes needed to the header information by typing the field number and ENTER. If you do not know the correct header field number you may use SHIFT 1, 2, 3, 4, 5 or 6. The main screen can be accessed by pressing SHIFT O.
 To override any header field, simply type in the field number to be modified from any screen. The field will be displayed and you may enter or modify that field.

The payment or shipment preference of the customer will determine the modification to the header information.
» Cash sales are to have a name entered into Fields 2 and 19. Note that you can enter the name in Field 2 and in Field 18 type “SAME” and press ENTER. The information in the customer fields will be duplicated into the ship to fields of the header.
» Freight shipments require a physical address. Enter this physical Ship-To information in Fields 19 thru 26.
» If the customer has an open account with J & E, the order is entered under the customers account number but Field 145, AR TO, should be changed to 9, for Cash. This will assure that the customer gets their correct discounts and they will not be double billed on their credit card and their open account.
» All pick-up orders must have a contact name and phone number entered on the order. This will allow the inside sales staff to call the customer in case of problems or back orders. Enter the contact name and phone number in Fields 20 thru 22. Note: The customer address side of the header information can not be violated with miscellaneous information. You may use the Ship-To side for any pertinent miscellaneous information. Entering miscellaneous information on the Customer Address side will create postal problems.
» The customer’s tax status can be modified in Fields 141 and 142.
When you have entered all necessary information in the header fields,
- Select NEW LINE DETAIL by pressing “N” from the ring menu to enter the item ID of the parts ordered.
- Type the item ID number and press ESC. Note: at the bottom of the screen the computer tells you the inventory stock status of the selected item. The computer will prompt you if there are not enough parts to fill the quantity needed for the line. You can select to accept and back order the parts, cancel the line or check other branches for any available stock. If the part does not have an item ID number, you must get a number made or enter a special number.
- When the item description comes up on the screen, enter the quantity to order then press ENTER. Note: you can update the item pricing in Field 9. There is a second line of description in Field 28. Ask your immediate supervisor for help on pricing special made and non-priced parts.
- If the item description is the correct part, the selling price is correct and the quantity is ordered correctly select NEW LINE DETAIL from the ring menu by pressing “N” for the next line and proceed to enter all of the items requested by the customer. REPEAT THESE STEPS FOR EACH OF THE ITEMS THE CUSTOMER HAS REQUESTED.
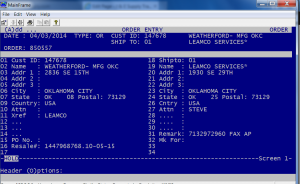
After all items have been correctly entered into the computer system, proceed to the SUMMARY screen.
Once there, select ACCEPT. When the Pick Ticket, “Program to Run” window opens, select RUN to print the pick ticket. The first part of an entered order is the picking ticket. To EXIT Order Entry, press DEL and E. Get your Pick Ticket at LP4, in the front sales office, staple the Pick Ticket and hand written order together, write the current time on he ticket on the left side of the paper below the customer information. Place the picking ticket in the correct tray. Criteria for picking ticket routing and filling in the warehouse is dependent on how the order is to be shipped and what type of parts are ordered. The trays for routing picking tickets are located in the Inside Sales office. The “To Be Filled,” trays are setup as follows:
- URGENT Orders in a tray to the left of the “To Be Filled” trays, closest to the door.
- PICK-UP Orders (oldest at the top) in the left side of the two long trays.
- DELIVERY Orders in the right side of the two long trays.
- SHIPPED Orders below the DELIVERY orders in the right side of the two long trays.
Pick Ticket Printing: PTP
The Pick Ticket Printing program is used to set up and initiate the printing of picking tickets. From a menu type “PTP” and press ENTER. the window that explodes will let you define what ticket will be printed. Press ENTER until the cursor is at the “Selected Option:” prompt. At this prompt select Option 2 and enter the selected order number. Press ESC twice for a printing prompt. Note: it is important that you do not select Option 1 or Option 2 with a null order number. This will cause the printing of all open pick tickets. At the printing prompt select LP4 and press ENTER.